Getting Started with Editly
Editly for Elementor is built for agencies and freelancers who manage dozens of client sites. Instead of logging in for every micro-change (new campaign headline, last-minute price tweak…), you hand clients a safe, ultra-simple interface so they can update copy themselves—no risk, no builder overload, no broken layout. Result: more autonomy for the client, fewer “quick fixes” in your inbox, and happier marketing & SEO teams who can keep content fresh in seconds.
Minimum Requirements
- WordPress ≥ 5.6
- PHP ≥ 7.4
- Elementor ≥ 3.0 (Free or Pro)
Installation
Set-up is a one-minute, one-file affair—no extra add-ons or CLI tools.
Step-by-Step
- Download the
.zipfrom your Freemius purchase e-mail. - WP-Admin ► Plugins ▸ Add New ▸ Upload Plugin.
- Select the file, click Install Now, then Activate.
- Editly immediately indexes every Elementor page; nothing else needed.

Licence & Account
Activate Your Licence
- After activation, the “Activate Editly” popup appears.
- Paste your licence key and click Activate.
- Freemius sends a quick e-mail—click the link to confirm ownership. Done ✔︎

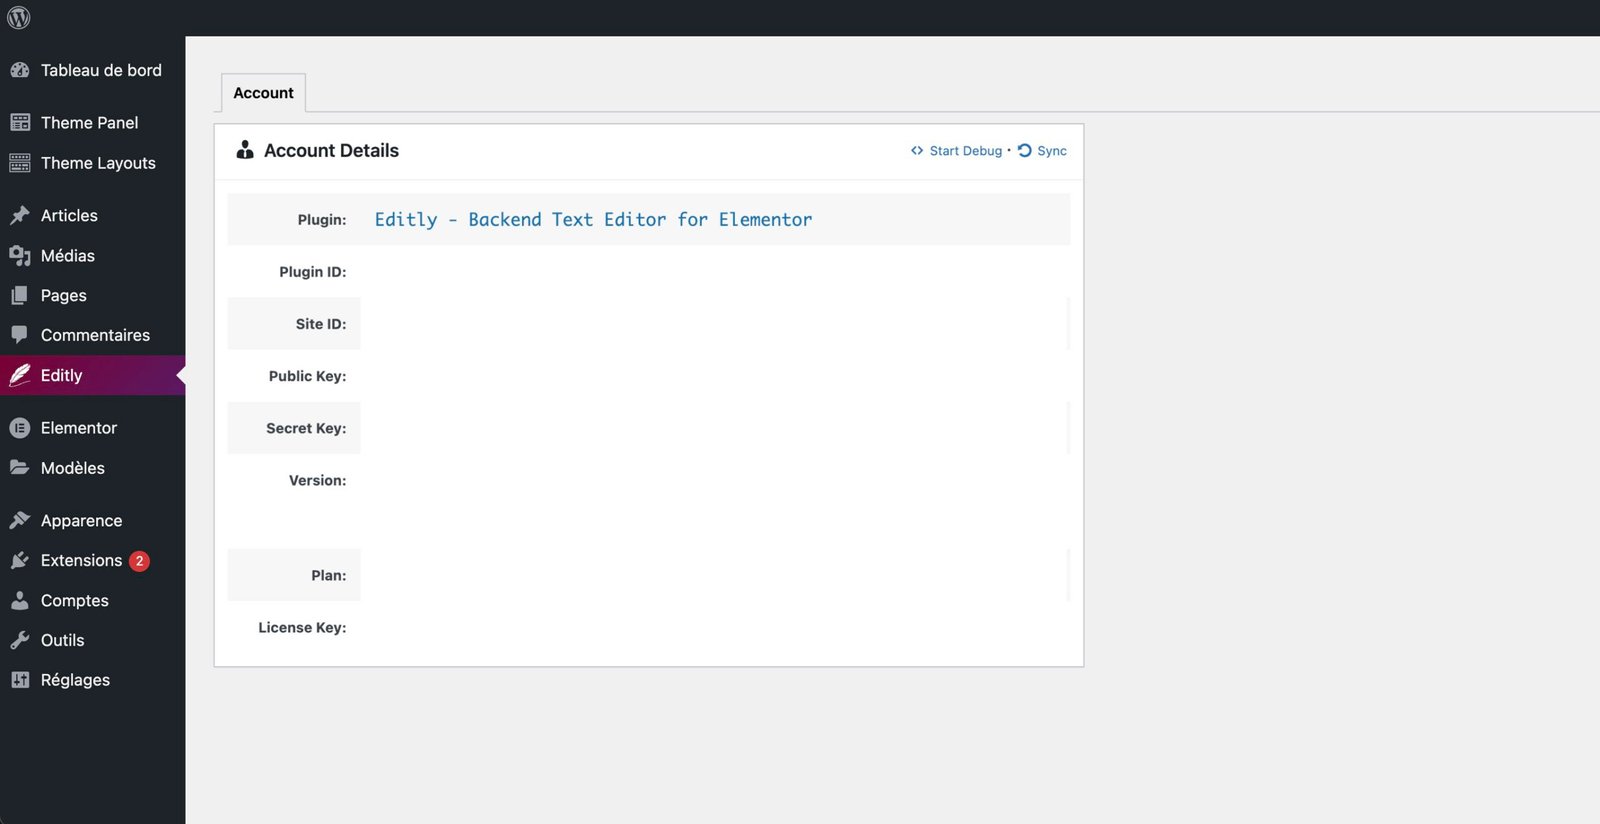
The Account Page
Located under Editly ▸ Account, this dashboard lets you:
- Check Status – Active / Expired / Inactive.
- See how many sites use the licence (multi-site keys).
- Upgrade plan, download invoices, or deactivate a domain in one click.
Choose a Page
Open Editly ▸ Texts; all Elementor pages are listed in the left panel. Simply click the one you want to edit.
- No search field is needed—pages are usually few and easy to scan.
- Only pages built with Elementor appear; classic WP pages or posts stay hidden.

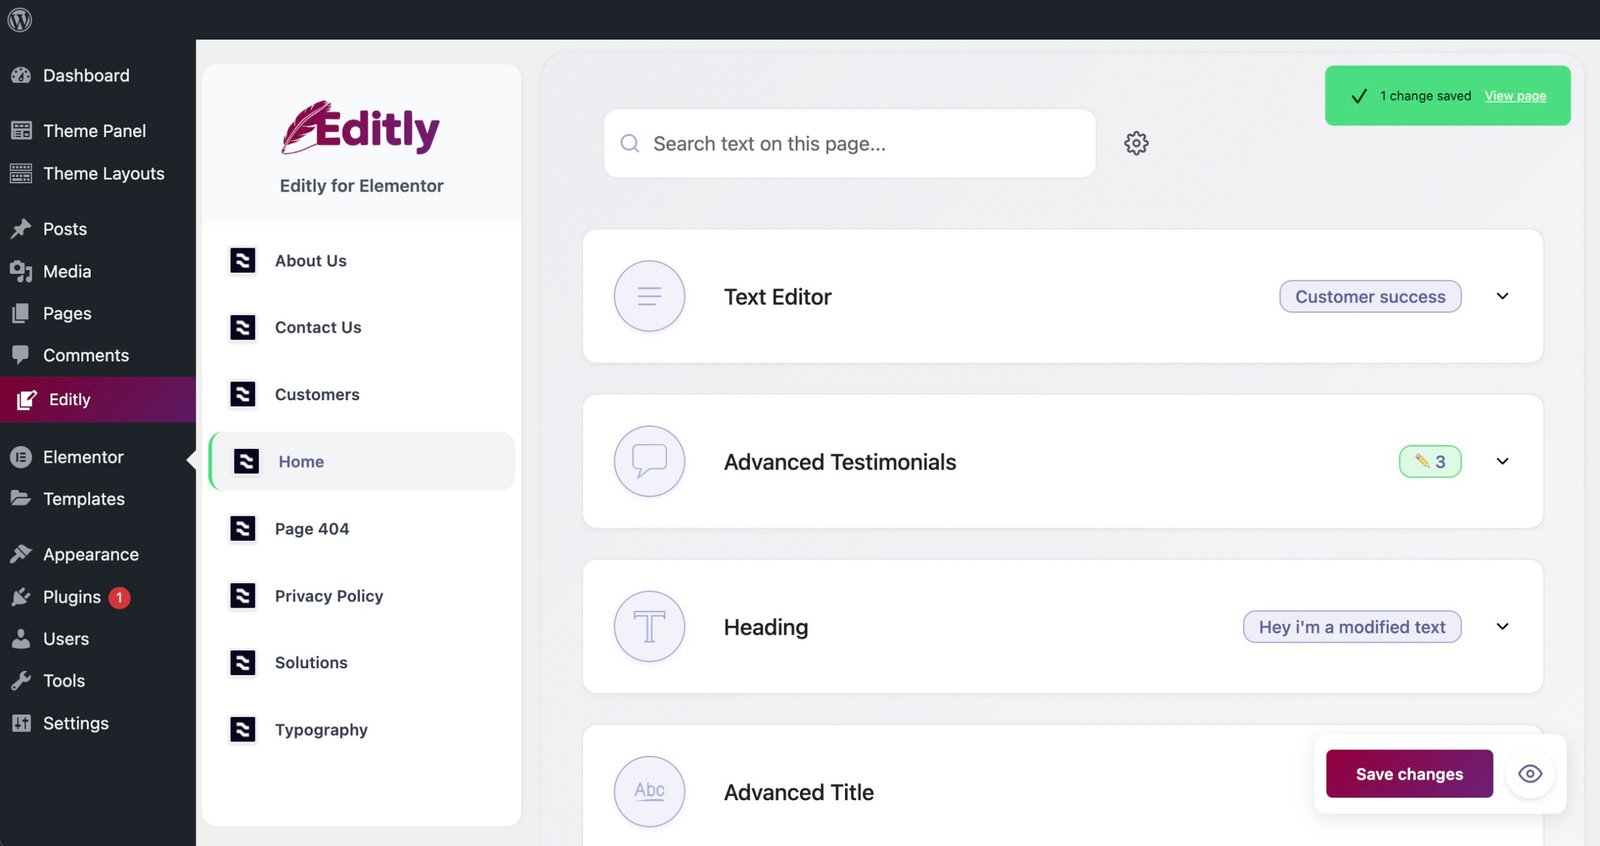
Editing Texts
When you open a page, Editly parses the Elementor JSON and lists every text node—native widgets and third-party add-ons alike.
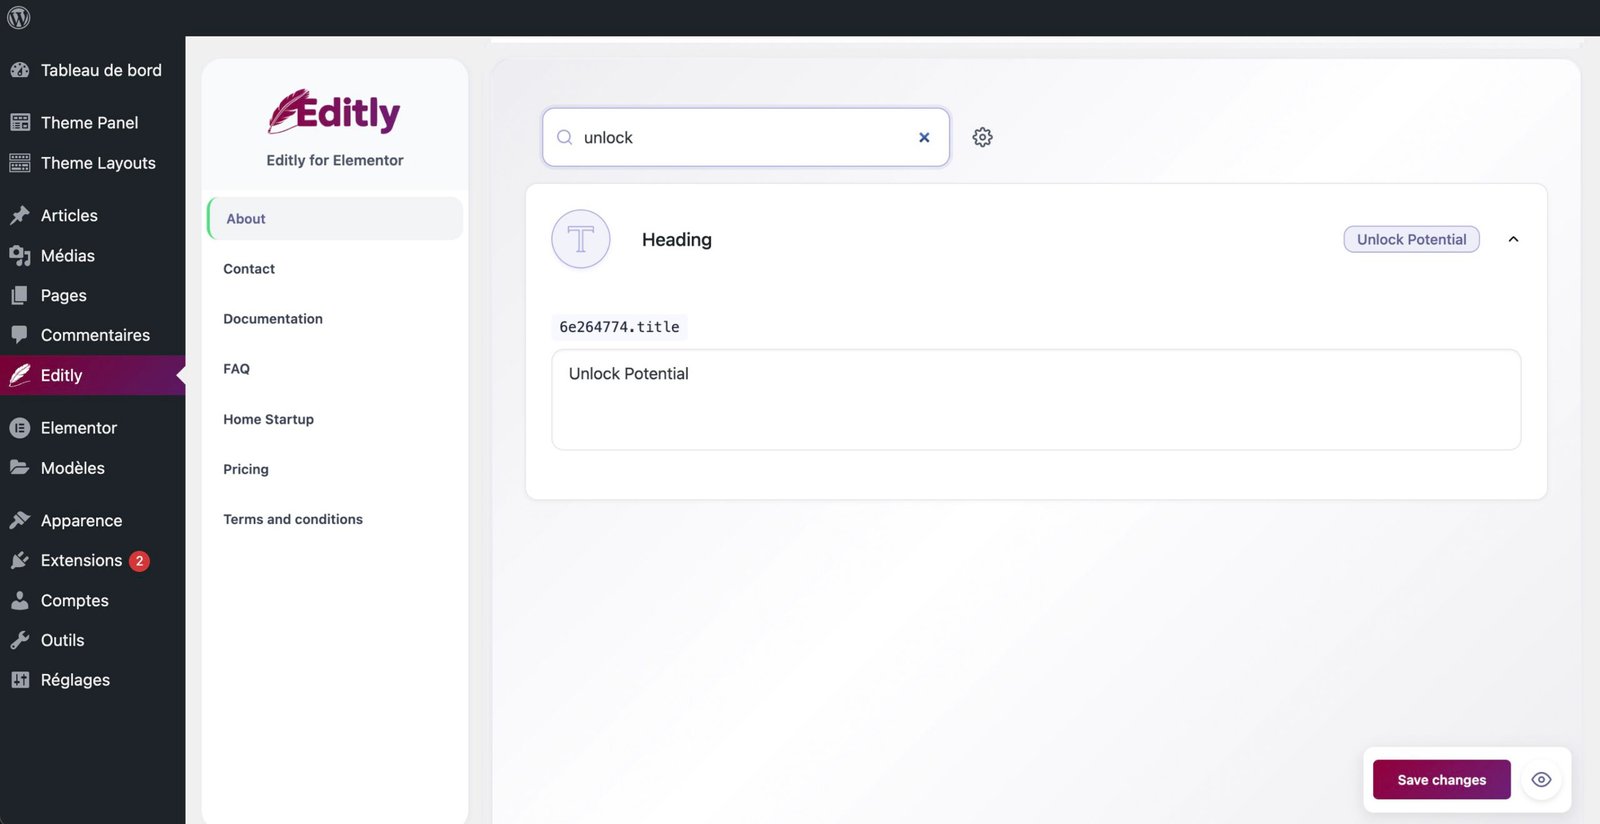
Quick Search
A universal search bar at the top filters the list in real-time. Type any keyword to jump straight to that piece of copy—perfect for long landing pages.
Badges & Previews
- A small badge (
2,3…) on each row tells how many editable text fields the widget contains before you expand it. - If there is only one field, the row shows a live preview of the text instead of a number.
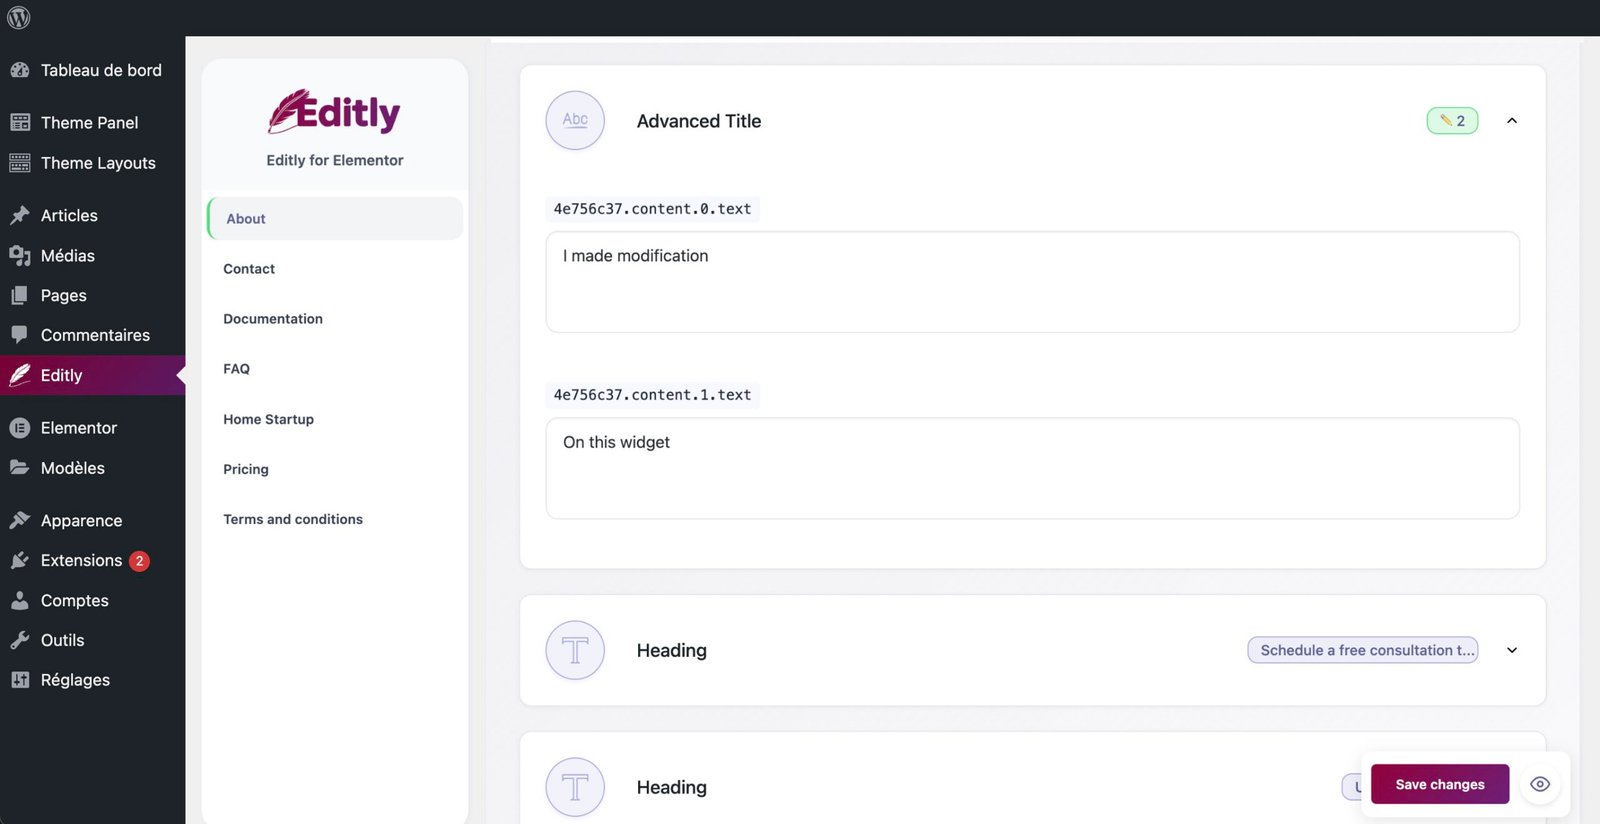
Inline Editing Flow
- Click a row – it expands and shows the text field(s) contained in that widget.
- Edit the text directly—plain textarea for simple strings, a TinyMCE toolbar for rich-text/HTML widgets (bold, lists, links …).
- Press “Save changes” (bottom right). A green notification confirms the update and states it’s already live on the front end.
- Wrappers and CSS classes are never touched—your layout remains pixel-perfect.

Validation & Publish
The Save changes button also launches a confirmation modal:
- Lists every modified field and shows the total number of edits.
- Confirm & Publish pushes the update; Back to Edit re-opens the form.
- Notification colours Green = success / Orange = nothing to save.
- A direct link lets you preview the updated page instantly.
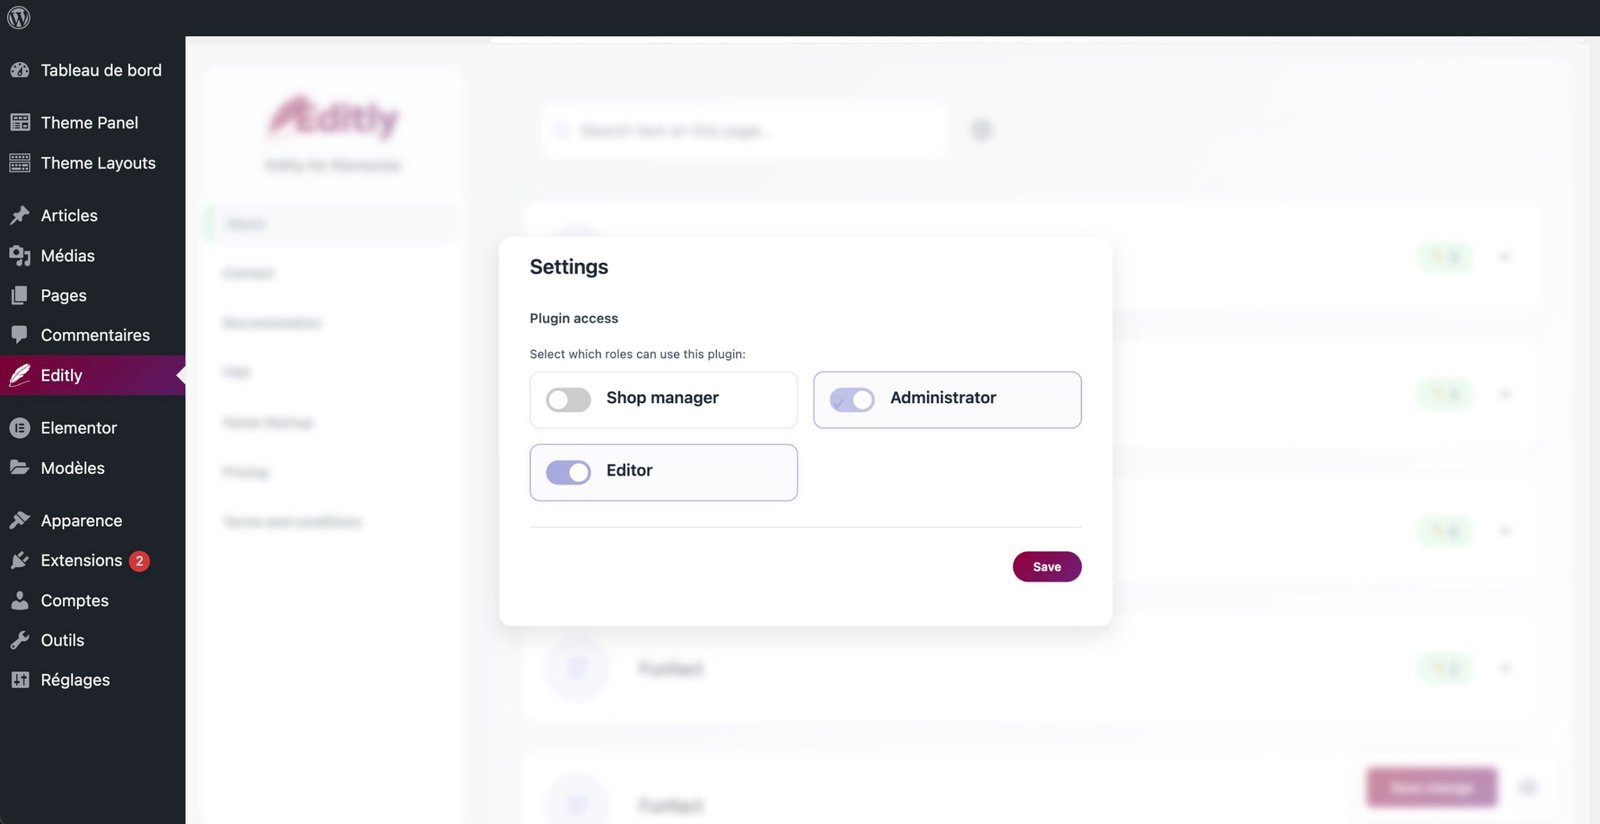
Roles & Permissions
Editly adds one capability: editly_manage.
Only users who have it see the Texts screen.
Who Should Get Access?
| Role | Default Access | Typical Use |
|---|---|---|
| Administrator | ✔︎ | Site owners, agencies |
| Editor / SEO Manager | Optional | Marketing teams, content writers |
| Author, Contributor, Subscriber | ✖︎ | Not recommended |
Administrators manage permissions in Editly ▸ Settings.
A common workflow is to create a dedicated Editor user for the
client and enable editly_manage—they can change copy while
you keep full control of design.